Open/Import… Dialog
The dialog for opening items behaves like a typical dialog in all respects. However, because opening can mean varying things in the program — opening may generically refer to calling a data file, or adding a saved state to the project, or importing any number of object types, and more — this dialog also provides, on its right, a set of options that may be used to specify the exact intended outcome of “opening” a selected resource.
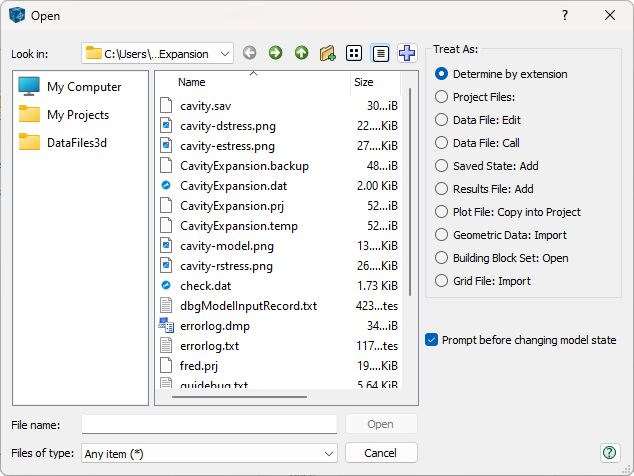
Figure 1: The Open/Import… dialog.
The dialog will operate as most typical Open dialogs do, however, it contains a few easily overlooked features that are worth noting.
Treat As
As mentioned above, to “open” something in Itasca software can mean varying things. Selecting an option from this area makes an explicit declaration about what is to occur when the button is pressed.
The default option when the dialog is called is Determine by extension. This leaves the decision with the program, which will perform an action based on the extension of the selected file, if possible.
In the case of data files, a selected file may be opened in the workspace (Data File: Edit) or may be opened in the workspace and executed (Data File: Call). Of these two options for data files, a data file will be opened using the Data File: Edit option if Determine by extension is selected.
For saved model state files, using the Saved State: Add option adds the file to the project, in which case it will appear in the i Project pane. After adding a saved model state, a second dialog will prompt the user whether to also restore the file as well, or simply add it. CS the following is no longer true. A saved model state may be added to the project and restored using the “Saved State: Restore” option.
Using the Plot File: Copy into Project option will open the requested file in a new plot in the workspace.
The Geometric Data: Import option will open a requested geometric data set (DXF, STL) as a geometry set and show it the geometry workspace.
The “Favorites” Box
The box to the left is the Favorites box. The user can control what folders appear there. To add a folder to this area, use the dialog’s controls to navigate to the folder of interest. Once there, press the plus button (  ) to add the current folder to the Favorites list.
Remove an item from the Favorites list by right-clicking on it and choosing “Remove”. Note the “My Computer” item cannot be removed this way.
The Favorites list grows automatically with program use.
| Was this helpful? ... | Itasca Software © 2024, Itasca | Updated: Apr 02, 2024 |
