
Making a Square
Using Snap-to-Angle
You can make a square with the help of the snap-to-angle feature.
First, check the Extruder options in the Options dialog to make sure the snap-to angle allows snapping to a 45 degree angle. For example, you could set the angle to 15, 22.5, or 45 degrees; they all allow snapping to 45 degrees.

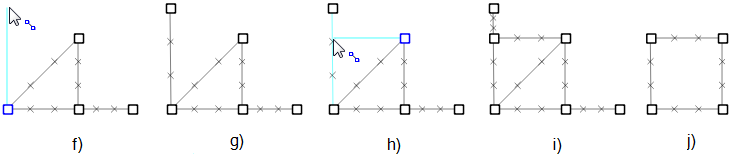
Next, select the point-edge tool from the toolbar ( ). Click to create a point, then hold down the Control key and move the mouse to make a 45 degree line, then click to set the second point. (The Control key causes the line to snap to an angle.) This 45 degree line defines the dimensions of the square. You can watch the status bar at the bottom of the main window to see the length of the line as you move the mouse.
Now you just need to add the remaining lines to complete the square. Continue using the Control key to snap to angles.

- Add a line at 45 degrees.
- The length of the line defines the size of the square.
- Add a horizontal line that extends beyond the size of the square.
- Add a vertical line that intersects the horizontal line.
Repeat the process for the other half of the square, then delete the extra points and edge.
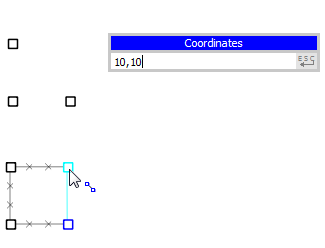
Entering Point Coordinates
An alternate method is to use the space bar to display the coordinate editor. Enter coordinates for the 4 corners of the square, then use the point-edge tool to connect the four corners.
| Was this helpful? ... | PFC 6.0 © 2019, Itasca | Updated: Nov 19, 2021 |