Densify Selected Zones
At the end of the list of tool buttons for the Model pane, there’s a tool button with a menu attached. The menu holds the command for densifying selected zones. It is enabled only when one or more zones are selected.
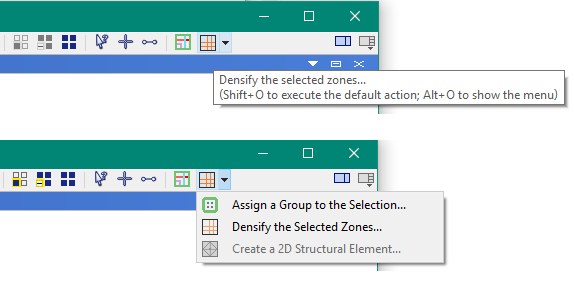
With zones selected in the Model pane, you can choose the “Densify the Selected Zones…” command ( ) to show the following dialog. Note that this dialog implements the
 zone densify command.
The current selected zones are densified according to the parameters selected in the dialog.
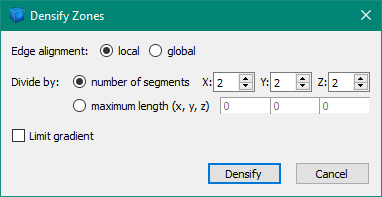
The “Divide by:” fields indicate the number zones an original zone will be divided into, in that direction. By default, a zone will be divided in two in all three directions, resulting in 8 new zones. Be careful when densifying by different values in each direction, as this can cause incompatibilities in the resulting mesh.
Alternatively, you can choose “Maximum Length”, which will pick the number of divisions in each direction until the resulting zone edge length is below that value.
The “Edge Alignment” value determines how the “x”, “y”, or “z” directions are resolved. By default, a zone “x” direction is local to its particular orientation. For example, “x” is defined as the direction from gridpoint index 1 to gridpoint index 2. If “global” is selected, then which zone edge that applies to is determined by picking the edge that most closely matches one in the global x direction.
Lastly, the “Limit gradient” option can be selected. This detects if zone densification is occurring more than once from one zone to the next, and densifies those adjacent zones to reduce the speed at which zones size is decreased from one zone to the next.
| Was this helpful? ... | FLAC3D © 2019, Itasca | Updated: Feb 25, 2024 |