Curved Edges and Control Points
The control point tool ( ) in the toolbar is used for shaping edges (and faces). It puts the mouse into a mode for adding one edge control point after another.
When you click an edge with the control point tool, a control point gets added to the edge. When you drag the control point with the mouse it changes the shape of the edge.
Three types of edge are available.

With a control point selected, you can change the edge type in the Object Properties control set or through the context menu for the edge.
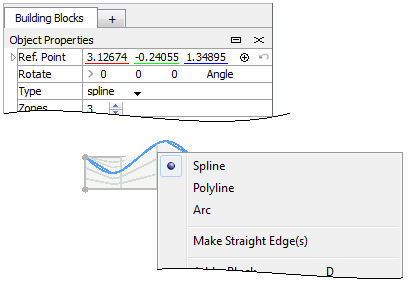
The context menu also has the command “Make Straight Edge(s)” which will remove all control points from an edge.
An edge of type “arc” can have only one control point; the other edge types make use of multiple control points.
Multiple control points can be selected at the same time, but only for one edge at a time.
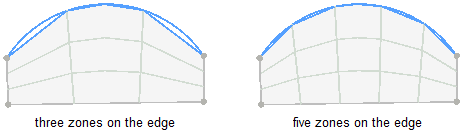
When you make an arc or a spline, you may see a divergence between the lines that draw the zones and the line showing the curved edge. The divergence can be remedied by increasing the number of zones for the edge.
Transparent Faces
While you are working in Control Point mode, any face that you move the mouse to will become transparent. The transparent face allows access to control points that are positioned inside a zone, otherwise known as buried control points. The transparent face also allows access to edges and body points. However, point-to-point snapping will not snap a Point A to a buried Point B whether it’s a control point or body point.
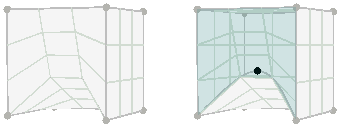
An alternate way to access buried points is to use the mouse wheel to zoom to the inside of a block.
| Was this helpful? ... | FLAC3D © 2019, Itasca | Updated: Feb 25, 2024 |