Performing the Extrusion
Once the necessary information has been entered into the construction view and extrusion view, your model can be extruded into either building blocks or a mesh.
To extrude the model, click either the “Create building blocks…” tool button ( ) or the “Extrude” tool button (
 ). In both cases, the tool button is active only when the extrusion view is active. Both buttons are disabled in the construction view.
Building Blocks
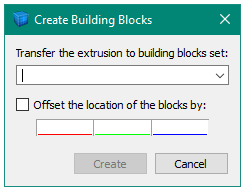
When you choose to create building blocks, a dialog will appear asking you to name the set of blocks to extrude to (it could be an existing set or a new set) and optionally provide a change in location.

The new extrusion will be displayed in the Building Blocks pane.
Mesh
The first time you create a mesh, all you need to do is click the extrude button. The resulting mesh will be displayed in the Model pane (you may have to press Control+R to reset the view).
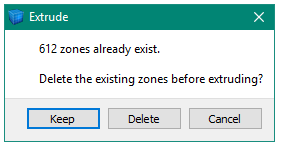
Each time you use the extrude button — and it may be used repeatedly, even on the same extrusion set, even without any change being made to the set — it adds zones to the model. Once a model contains zones, each successive use of the extrude button will show the warning dialog seen here.

Figure 1: A warning dialog occurs when attempting to extrude an extrusion set when the model already has zones
Choosing “Keep” will retain all existing zones and add the zones coming from the requested extrusion. “Delete” will remove existing zones from the model and create new ones from the requested extrusion. Pressing “Cancel” terminates the extrusion before any changes are made to the model.
Status Bar
While the model is being extruded — which may take a few moments, depending on the complexity of the extrusion set — a progress bar is displayed on the right side of the status bar.
| Was this helpful? ... | PFC 6.0 © 2019, Itasca | Updated: Nov 19, 2021 |
