Making a Circle
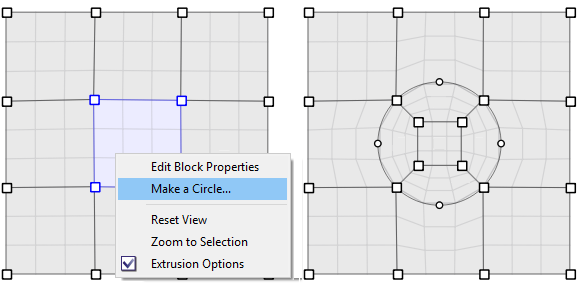
The easy way to make a circle is to create a block and select it in Selection mode, and then choose “Make a Circle…” from the context menu. This command will be available only when a single block is selected. This can be used with 3- or 4-sided blocks.

When used with a 4-sided block, the circle will get a square block added inside it. The square helps improve the shape of the zones inside the circle.
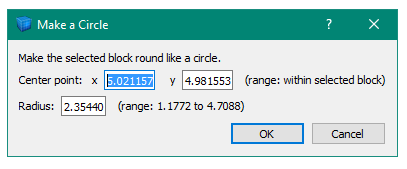
A dialog box appears when you choose the “Make a Circle” command. Here, you can enter values for the center and radius of the circle. Default values are filled in based on the selected block.

The dialog will show range limitations if the selected block is attached to any other point. This helps prevent the block from growing or shrinking too much. It’s best to start with a block that is already at or near the size and position that you will want.
A free-standing block does not have the range restrictions of an attached block. Any values (within reason) can be entered for the center point and radius.
After you make a circle from a 4-sided block, you can check the diameter of it by selecting two opposing points and observing the distance between them as displayed in the status bar.
Be careful putting circular blocks next to each other. They can easily create small overlapping areas that are not easily recognized but will make the geometry invalid.
Individual Edges
To make individual edges that form the arcs of a circle, you can use snap-to-angle functionality.
- In the Extrusion section of the Options dialog, set the increment for snap-to-angle to 22.5 degrees.

- Using the point-edge tool (
 ), hold down the Control key and make a horizontal line in the extruder. (The Control key makes lines snap to angles.)
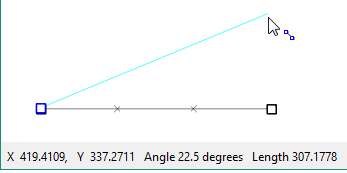
 - Still holding down the Control key, make a line from the left point up to the right at an angle of 22.5 degrees. The status bar will show that the edge is up 22.5 degrees from horizontal.

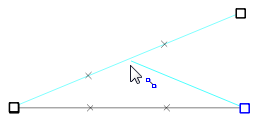
- Make an intersecting edge up 22.5 degrees from right to left (still using the Control key). The point of intersection will lie on a circle that includes the first two points.

- Delete the extra point at the top-right.
- Use the control point tool to add a control point to the horizontal line.

- Select the top point, press the space bar, and copy the coordinates from the popup property editor. Then click the point and press the Delete key.
- Select the control point, press the space bar, paste the new coordinates into the popup property editor, then press Return. This moves the control point up to the position of the previous point.
- Select the edge and use the control panel to change the edge type to arc. This arc forms one-fourth of a circle.

At this point, you can add the other three sides that would be part of a square and repeat the above process to turn each side into an arc. The end result is a circle.
| Was this helpful? ... | 3DEC © 2019, Itasca | Updated: Feb 25, 2024 |
