Extrusion Length and Stages
Length/Depth
Initially, the extrusion view will show one horizontal edge with a point at the left end and a point at the right end. The difference in depth of these two points defines the total length of the extrusion. You can click either point and press the spacebar to see and edit its depth. The depth can also be edited in the Object Properties control set in the Control Panel, or by dragging the end point (the right end) with the mouse.
The point at the left is the starting point of the extrusion. It’s position can’t be changed with the mouse but can be edited. If you change it’s position, all the other points will change depth by the same amount.
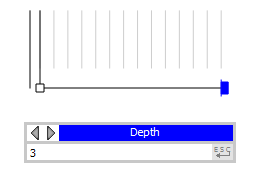
Figure 1: Extrusion depth
Stages
The extrusion can be divided into multiple stages. With the point-edge tool ( ) active, move the mouse pointer to an edge so that the edge highlights in cyan. When you click the edge, a new point will be added to mark a stage of the extrusion.
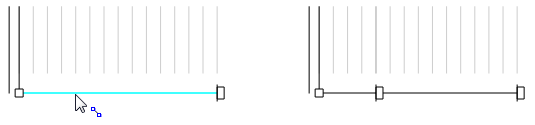
Figure 2: Adding a stage
With the selection tool (![]() ) active, you can select a point and press the spacebar to see and edit the depth of the point. Or, with no points selected, you can type the depth for a new point and press Enter to create the point.
) active, you can select a point and press the spacebar to see and edit the depth of the point. Or, with no points selected, you can type the depth for a new point and press Enter to create the point.
Deletion
The starting point at the bottom-left corner can’t be deleted.
A point marking an intermediate stage can be deleted; just select it and press the Delete key.
The end point can be deleted if there is an intermediate point that can become the new end point. Otherwise, the end point can’t be deleted.
| Was this helpful? ... | FLAC3D © 2019, Itasca | Updated: Feb 25, 2024 |