Objects Panel (PFC)

../../../../../../../_images/layout-objects.png

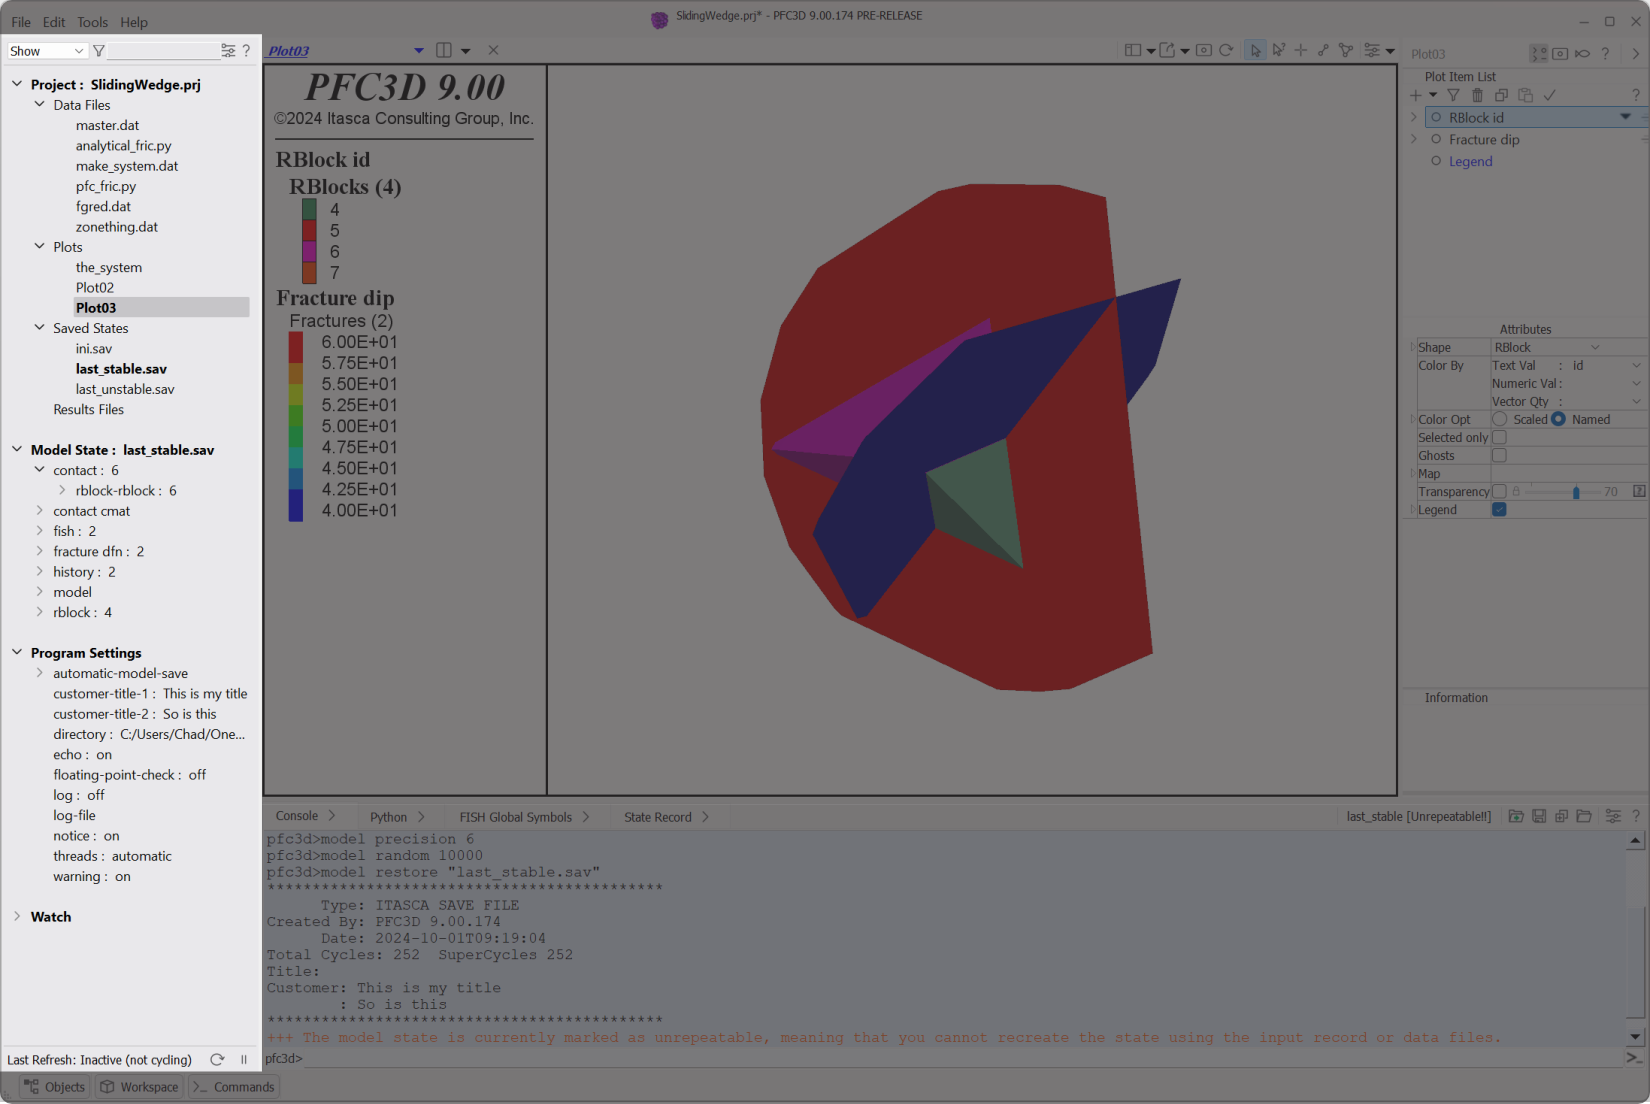
Figure 1: The Objects panel in the program layout.

The Objects panel provides a continuous tree-format view of the current project, the current model state, the current program settings, and user-selected (watched) items from the model state.

NOTEWORTHY

The object tree provides drag-and-drop operations for tree elements to other parts of the program (windows in the i Workspace or the i console tab in the Commands area). See Project Branch, Model State Branch, and Watch Branch for more information.

Tree items are interactive: they provide drag-and-drop, context menu (right click), and double-click behaviors. The “Project” branch of the tree supplies the functionality found in the Project Pane of previous versions of the program. For each item there, the menu selection in bold on the context menu indicates the default action for that item, i.e., the action that occurs when the item is double-clicked. The double-click action will take place the active workspace window.

Overview

../../../../../../../_images/objectpanel-overview.png

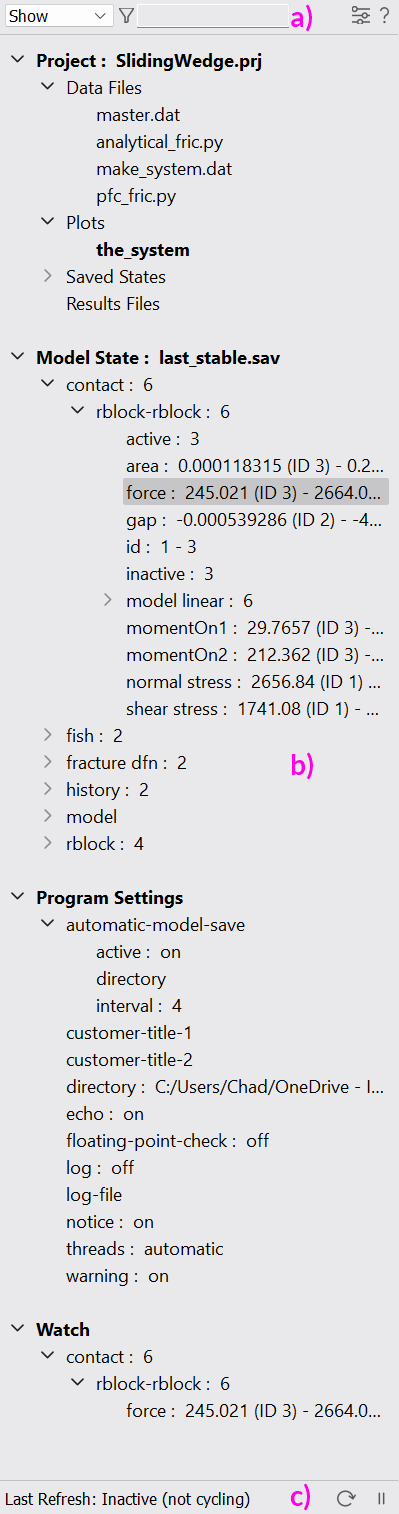
The Objects panel has three main components: the toolbar, the tree, and the control bar (labeled a), b), and c), respectively, in the adjacent image).

The tree is the core of the Objects panel. It comprises four branches: “Project”, “Model State”, “Program Settings”, and “Watch”.

When a new project is started, each of the four branches are predominantly empty (the “Program Settings” branch will always display current settings, so it is never empty).

In the adjacent image of the Objects panel, the example project Sliding Wedge is loaded and run to populate the tree in an illustrative way.

a) The toolbar allows the user to select which tree components are visible using the “Show” select control, to filter the tree by simple strings (filter), to access help (i.e., this page, using help), and to access settings for the panel (settings). Details of each of these operations are provided below in Objects Panel Toolbar.

b) The tree continuously tracks all aspects of the project, model state, program settings, and watches at all times. As items are added/subtracted in any area, they are added and subtracted from the tree. “Project” branch items on the tree currently open in the workspace (for example, “the_system” in the adjacent image) are listed in bold.

c) The control bar indicates when the tree was last refreshed, and provides buttons to pause automatic tree refresh (pause) and manual refresh (refresh). The importance of these operations described below in Objects Panel Control Bar.

Display of the tree can be widened by dragging the divider between it and the Workspace as needed. Display of the entire panel is toggled using the “Objects” button on the program status bar (in the lower left corner of the program).

Project branch

Users of previous PFC versions will find the “Project” branch to be comparable to the old Project Pane; review of the section below for experienced users is recommended. Operations on items in this branch are described in the topic project-branch.

Tip

Hover over an element on the tree to see a tooltip for that element—the tip will identify what the value on the element label specifies.

Model State branch

The “Model State” branch indicates the current model state (save file), and (as mentioned above) will continuously change as the model is constructed and run. The items on this branch are the contents of the current model state. In most cases, either an indication of number of those elements or the minimum and maximum values of the elements is supplied. The branch only indicates those items that exist in the current model state; it does not list un-created elements within the model, therefore absence of a model object from this branch indicates that object is not part of the current model state. Operations on the items in this branch are described in the topic Model State Branch.

Program Settings branch

The “Program Settings” branch indicates settings in effect that are persistent in the program—they do not vary between projects. Many of these settings are controlled via the Options Dialog, or may be set using c program commands.

Watch branch

The “Watch” branch of the tree is constructed by setting an element from the “Model State” to be watched. Given that the latter branch can become quite lengthy as a project evolves, the “Watch” branch allows the user to create a streamlined view of elements of the model state that are of greatest interest. The mechanisms for adding/removing items on the “Watch” branch are described in the topic watch-branch.

In the image above, the maximum and minimum force on rblock-rblock contacts has been added to the “Watch” branch.

Additional Topics

▸ Object Panel Toolbar

The toolbar at the top of the panel provides the following four utilities.

Show select control

This control allows independently toggling display of each of the four main branches of the tree. By default, all branches are checked “on” for display. This is a program setting; it is not saved with the project. When an item is not set for display on the tree (unchecked), it is also not included in tree updates.

filter Filter control

The edit box accepts strings by which the entire tree will be filtered. Tree display is reduced to only those tree elements (plus their “parent” container(s), as present) that match the string in the field. Clear the field to restore the full tree to display.

Note this will not filter into tree items that exceed the display limit.

help Help button

Show the help topic (this page) for the panel in the Help window (or default browser, depending on the user setting).

settings Settings button

Access settings need to write a page for the options dialog for the settings so the preceding word can be a link to it. for the Objects panel.

../../../../../../../_images/objects-settings.png

Figure 2: The option settings for the Objects tree.

The functions of the settings shown are described below in objpanel-treeupdating and objpanel-expusers, respectively.

▸ Object Panel Controlbar

The bar at the bottom of the Objects panel comprises three elements.

The “Last Refresh” message

This message will indicate a time (in seconds) since the last refresh, if the program is actively updating the tree (more on this below). If the tree is not actively being updated (refreshed), the message “Inactive (not cycling)” will appear. When actively monitoring the model values on the tree during cycling, it is recommended to keep this message in mind—particularly if also observing model plots or FISH values.

When the duration since the last update of the tree exceeds three seconds, this message is colored orange; if it exceeds five seconds, it is colored red; either is an important alert to the user that tree update processing is taking a long time. When this occurs it suggests there may be a problem in the model; tree updating can only take that much time when the model has become extremely large in some degree.

refresh Manual Refresh button

Force a refresh of tree information now. Note this can be used at any time but will become necessary when automatic updating has been paused (next item).

pause Suspend Automatic Updating button

Press this button to stop automatic tree updates. At that point, the button icon changes to (unpause). Press the button in this state to resume automatic updating. The next section explicates the utility of this control.

▸ Tree Updating

The tree is updated after any command is executed. If the model is cycling or otherwise busy with a single operation/command (e.g., generating zones), it is updated at two second intervals. The duration of this interval can be set in the settings.

The time it takes to update the tree is generally a fraction of a second, and generally should not be a concern to users. However, if the overhead of tree updating is a concern, the following three strategies are proposed.

  1. Turn off automatic updating while cycling in the settings (this is the program default, so it only requires setting if the user has previously switched it off). This ensures tree updating will not slow cycling in any way. If used, the tree may still be refreshed as a oneoff action at the user’s discretion with the manual refresh button (refresh).

  2. Use the suspend automatic cycling button (pause). This eliminates the problem, but also causes the tree data to become stagnant. The user must take care when reading values from the tree in this state. Again, judicious use of the manual refresh button (refresh) is encouraged.

  3. Turn off display of the “Model State” branch and the “Watch” branch. Tree items not displayed are also not updated—and the “Model State” is likely the part of the tree slowing updates. As something watched is also an element from the “Model State”, that branch should also be turned off also to achieve faster tree updates (i.e., turning off “Model State” alone would not speed things up).

▸ Oversize List Handling

The number of items that may appear within a container on the tree is limited to a maximum of 1000 entries. If the number of items within the container exceeds 1000, then no items are listed and in place a message is shown, as seen here.

../../../../../../../_images/oversizelist.png

Figure 3: The “zone” element of the tree, opened, shows that in the “group” item, the slot “Default” contains more than 10,000 groups.

In this case, as there are more than 1000 groups[1] at this position on the tree, none of the items are listed at all. In order to see values for specific item(s) from this list, it will be necessary to select the item(s) to be watched, as follows.

Click the blue link seen in on the tree. This opens a dialog, that appears as follows.

../../../../../../../_images/setwatchdialog.png

Figure 4: The dialog from the tree can be used to set as many items as needed from the list onto the “Watch” branch of the tree.

Operation of the dialog is as follows.

  1. The title of the dialog indicates the item listed.

  2. The filter field provides a means of navigating the list (recall, it is probably quite long and scrolling may be inefficient at best). Press enter after putting a value in the filter field to filter the list to items whose names contain the string provided. Select desired items from the list; more than one item at a time may be selected (use shift or ctrl, respectively, to select groups of adjacent items or non-adjacent items).

  3. Press the “Add to Watch” button to add the current selected item(s) to the “Watch” branch of the tree. Repeat steps 2. and 3. here as desired.

  4. Press “Cancel” or “OK” to dismiss the dialog. “Cancel” will dismiss the dialog with no action taken—no groups will be added to the “Watch” branch, even if the “Add to Watch” button was used.

▸ The Objects Panel for Experienced PFC Users

The first section of the tree, the “Project” branch, should seem familiar to experienced users: it is a tree-form presentation of the contents of the old “Project Pane” in versions of PFC prior to Version 9.0.

Users of the new Objects panel in version 9.0 are advised that drag-and-drop operations on data files, save files, and plots may be easier and less user-error prone as compared to double-clicking on them to open/call/restore.

The double-click behavior was more apt for the kind of tabbed layout environment of previous versions. Though it still works here (for interface “backward compatibility”), it can produce unintended results if users are not mindful of which workspace window is currently active. The drag-and-drop support allows for more explicit assignment of content to the desired windows.

Use of drag-and-drop to manage opening and display of project resources is described in Project Branch.

Turn Off Double-Click

If habitual double-clicking is routinely producing unintended results, users are advised that one means of preventing this would be to use the switch in the options panel settings (see above) to turn double-click off for all tree items—which would then force the user to right-click or drag-and-drop to perform operations on items in the “Project” branch.

Endnote