Edge Tools
Creating Edges from Background Geometry
A geometric data file (e.g. DXF, GEOM, STL files) imported into an extruder set contains numeric information decribing the geometry. Using this information allows creating extruder edges which would conform to the background geometry. This can be done manually as described in Background Images / Geometric Data or automatically by pressing the Automatically Create Edges button ( ). When using the latter option, extruder edges will be created for every edge found in the background geometry.
Automatic edge creation is only available when a background geometry is present.
When creating edges from background geometry, the maximum number of zones which will be set for an edge is 1000 even if default edge parameters are set to more than 1000 zones. This is done for faster data processing and to avoid unnecessary memory consumption. If the number of zones on any automatically created edge is reduced to 1000, a warning message will be shown. Number of zones can later be changed individually for each edge in the Object Properties dialog or for all edges by using Automatic Zoning.
Note that a curved edge in the background geometry is represented by a number of straight segments and extruder edges are created along them. These edges can later be combined into a single curved edge as outlined below.
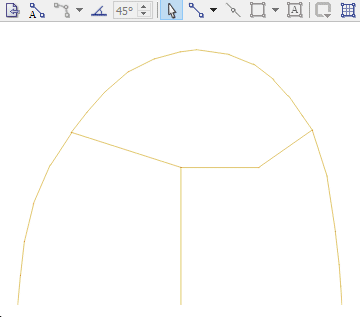
Selecting Edges by Break Angle
In order to select a number of connected edges at once press Select Edges by Break Angle button ( ) and click on an edge. All edges connected to it will be selected as long as the angle between two neighboring edges is below specified break angle. The selection also stops if an edge is connected to more than one other edge on any of the sides.
Edge selection mode stays active until user presses Select Edges by Break Angle button () again to deactivate it.
The break angle can be specified by placing mouse cursor over the numeric value and scrolling mouse wheel or pressing up or down buttons.
Combining Edges
After selecting a number of connected edges (either manually or by using Select Edges by Break Angle tool), the edges can be combined into a single curved edge (represented by Cubic Hermite spline). This operation is done by pressing Combine Selected Edges button ( ). Selected edges will be replaced with a single curved edge which may contain multiple control points (used to specify local curvature).
To adjust how closely a new curved edge mimics the original edges, adjust the tolerance for combining edges (click the nearby  button). The tolerance affects the number of control points on the new edge and therefore local curvature. The smaller the tolerance, the closer the new edge will mimic the original geometry, but it may have a large number of control points.
Combining edges is available only when two or more edges are selected.
The animated image below shows an example of a workflow for automatically creating extruder edges from the background geometry while using a specific default zone length and combining tolerance.
| Was this helpful? ... | 3DEC © 2019, Itasca | Updated: Feb 25, 2024 |